Publishing a Gradle project to Maven Central
I had some free time over the last few days to work on a small Java project, which I ultimately decided to publish on Maven Central. Due to being unable to find up-to-date samples for Gradle projects, I decided to collect my findings as a blog post.
While publishing projects to something like npm is fairly simple, uploading to Maven Central is a bit more involved, as they have much stricter requirements and validation.
This blog post will guide you step by step from a plain Gradle configuration to being able to publish JARs to Maven Central in no time.
👶 Baby steps
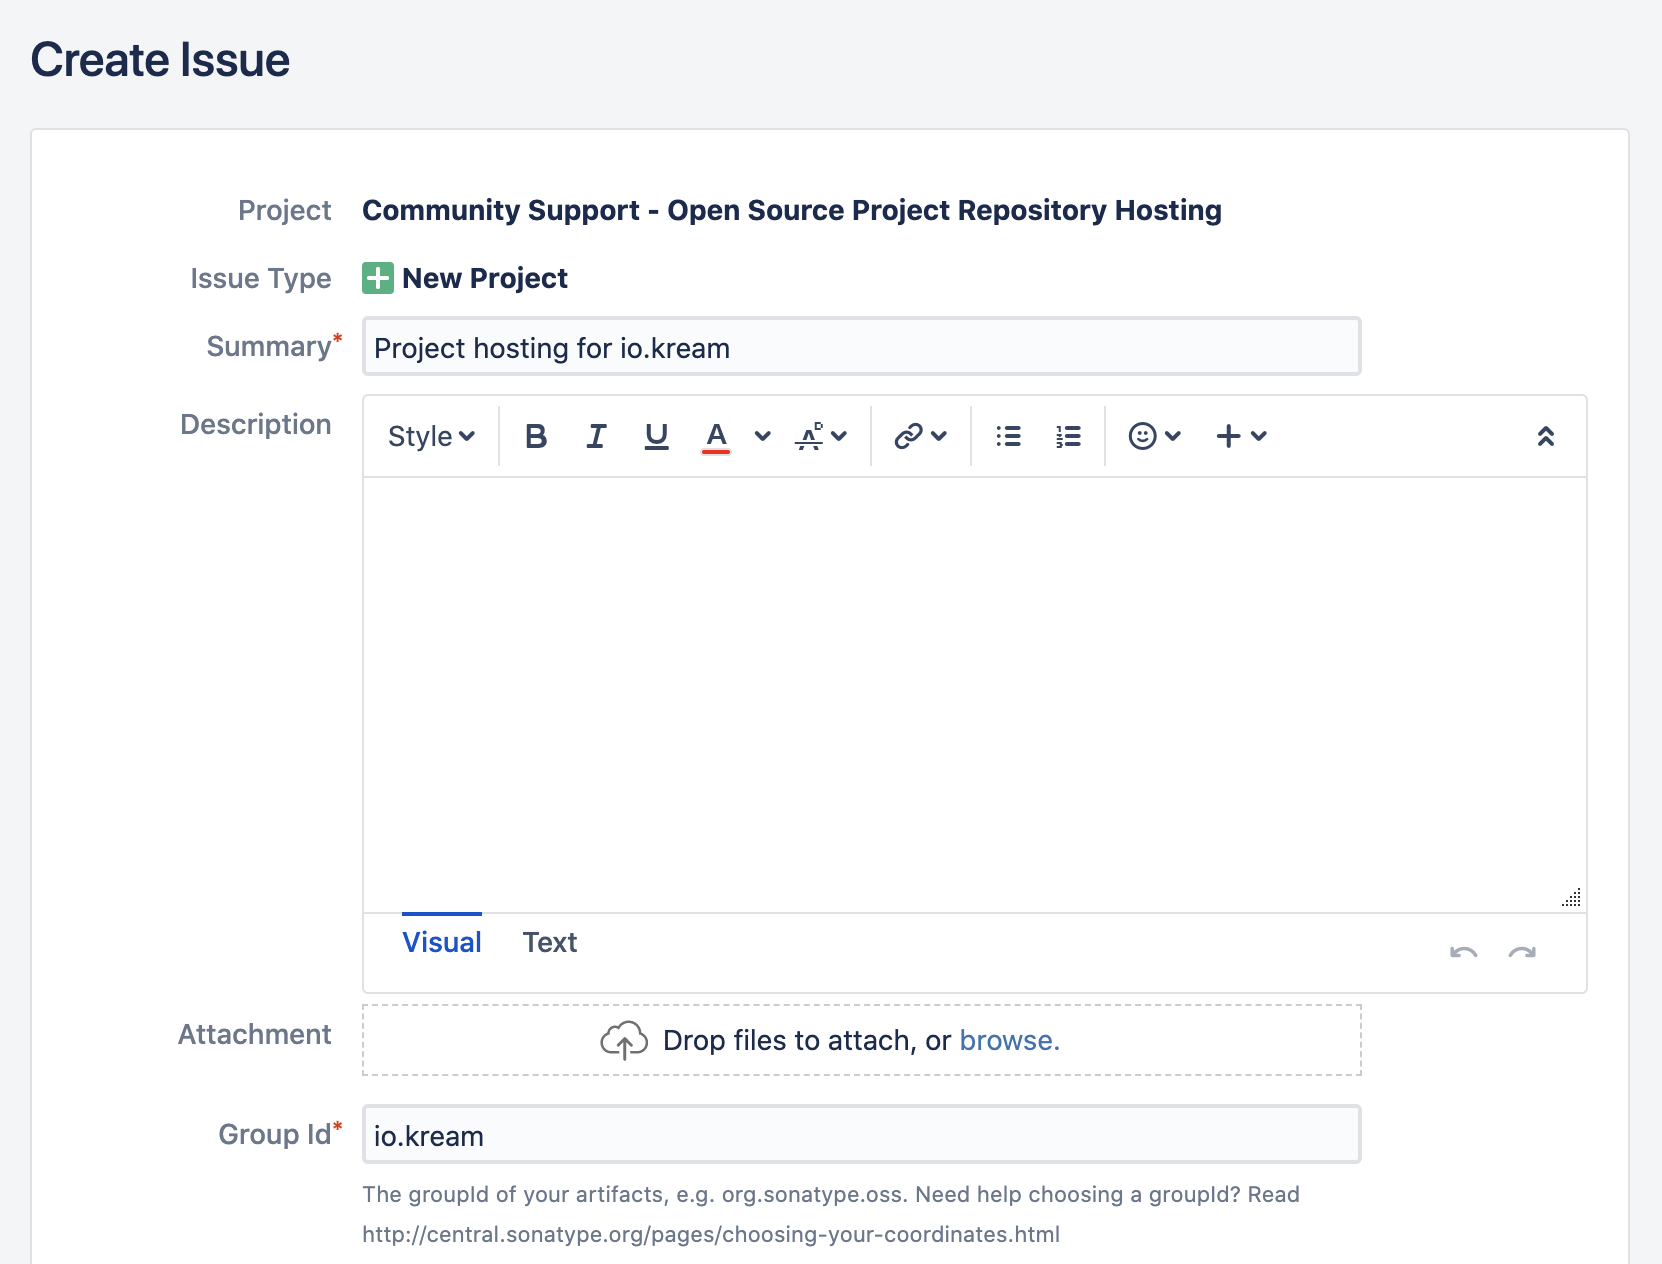
Create a Sonatype account
Before we start, you need to gain write access to the repositories. Visit Sonatype’s Jira,
create an account, and open a new ticket to claim your desired groupId.
If the group ID is an ordinary domain, you will need to prove ownership. In my case, to claim
io.kream, I had to add a TXT record referencing the ticket to my domain’s DNS configuration.
For reference, here’s my ticket.
As this is a manual process done by a Sonatype employee, the approval can take up to a few hours. Once the account is approved, you’ll be able to log in to the Nexus Repository Manager, along with the repository URLs you should use.
While we’re waiting, let’s configure the rest!
Generate a GPG key
To be able to sign the published artifacts, you’ll need a GPG key. For step-by-step instructions, you can refer to GitHub documentation, but the process is as follows:
# Make sure to generate a 4096-bit RSA key.
gpg --full-generate-key
# The first line contains your key ID, right after "sec rsa4096/".
gpg --list-secret-keys --keyid-format LONG
# Publish the key so other developers can verify your signature.
gpg --keyserver hkp://pgp.mit.edu --send-keys <KEY_ID>
# Export your secret key to a file.
gpg --export-secret-key <KEY_ID> > secret.gpg
Make sure to store the secret.gpg file in a secure place and save the key ID for later.
⚙️ Configuring Gradle
First things first, let’s add the maven-publish and signing
plugins to build.gradle.
plugins {
  id 'maven-publish'
  id 'signing'
}
As stated in the requirements, we need to include source and Javadoc JARs in the published package.
java {
  withJavadocJar()
  withSourcesJar()
}
Upon running gradle build, the build/libs directory should contain two additional JAR files,
ending with -javadoc and -sources.
Metadata
Since projects published to Maven Central require a pom.xml file, we’ll have to generate one.
For the maven-publish plugin to do its magic, we need to define a publication and the target
repository:
publishing {
  publications {
    jar(MavenPublication) {
      // Include JAR files.
      from components.java

      pom {
        name = 'project'
        description = 'The best project ever'
        url = 'https://example.com/project'
        licenses {
          license {
            name = 'MIT License'
            url = 'https://opensource.org/licenses/MIT'
          }
        }
        developers {
          developer {
            name = 'Me'
            email = 'me@example.com'
          }
        }
        scm {
          connection = 'scm:git:git://github.com/me/project.git'
          developerConnection = 'scm:git:ssh://github.com:me/project.git'
          url = 'https://github.com/me/project'
        }
      }
    }
  }

  repositories {
    maven {
      url = version.endsWith('-SNAPSHOT')
            ? 'https://oss.sonatype.org/content/repositories/snapshots'
            : 'https://oss.sonatype.org/service/local/staging/deploy/maven2'

      credentials {
        username project.findProperty('ossrh.username')
        password project.findProperty('ossrh.password')
      }
    }
  }
}
The entry names can be anything, but we’ve chosen jar as the publication and maven as the
repository. All available properties for the pom section can be found here.
You can inspect the generated pom.xml file by running gradle generatePomFileForJarPublication
and opening build/publications/jar/pom-default.xml. It will include the project information, all
the specified properties, and the dependencies.
As for the repositories section, we’ve specified the snapshot and release URLs, as instructed in
the Jira ticket. This way we can publish any number of SNAPSHOT versions before making the final
release.
You can specify your credentials in $HOME/.gradle/gradle.properties:
ossrh.username=<USERNAME>
ossrh.password=<PASSWORD>
To avoid storing your password as plaintext, you can generate a user token from your profile page on Nexus Repository Manager.
Signing
Unlike npm, all files published to Maven Central need to be signed with GPG. With the signing
plugin, this is as simple as adding the following section to build.gradle:
signing {
  sign publishing.publications.jar
}
Again, let’s store the credentials in gradle.properties:
# Last 8 symbols of the key.
signing.keyId=<KEY_ID>
signing.password=<PASSWORD>
signing.secretKeyRingFile=/path/to/secret.gpg
There are other ways to retrieve this information from environment variables or gpg-agent.
For details, please refer to the plugin documentation.
You can verify the configuration by running gradle signJarPublication or just gradle sign.
If everything is in order, the command will complete successfully. Additionally, the build/libs
directory will now contain .asc files for the individual artifacts.
⭐ Release!
Now that everything is set up, you can run gradle publish, and in about 30 seconds, your project
should be published to the Sonatype repository!
If you’re publishing a SNAPSHOT version, you’re all done, but if you’re trying to publish a
release version, we have to do some more manual work. Log in to Nexus Repository Manager
and click on Staging Repositories on the left.
This page will list your recently published staging versions. The repository should be in Open
state, which means it’s waiting for your review. You can inspect the repository contents, and once
you’re happy with it, click on the Close button. This will close the repository and trigger the
validation checks.
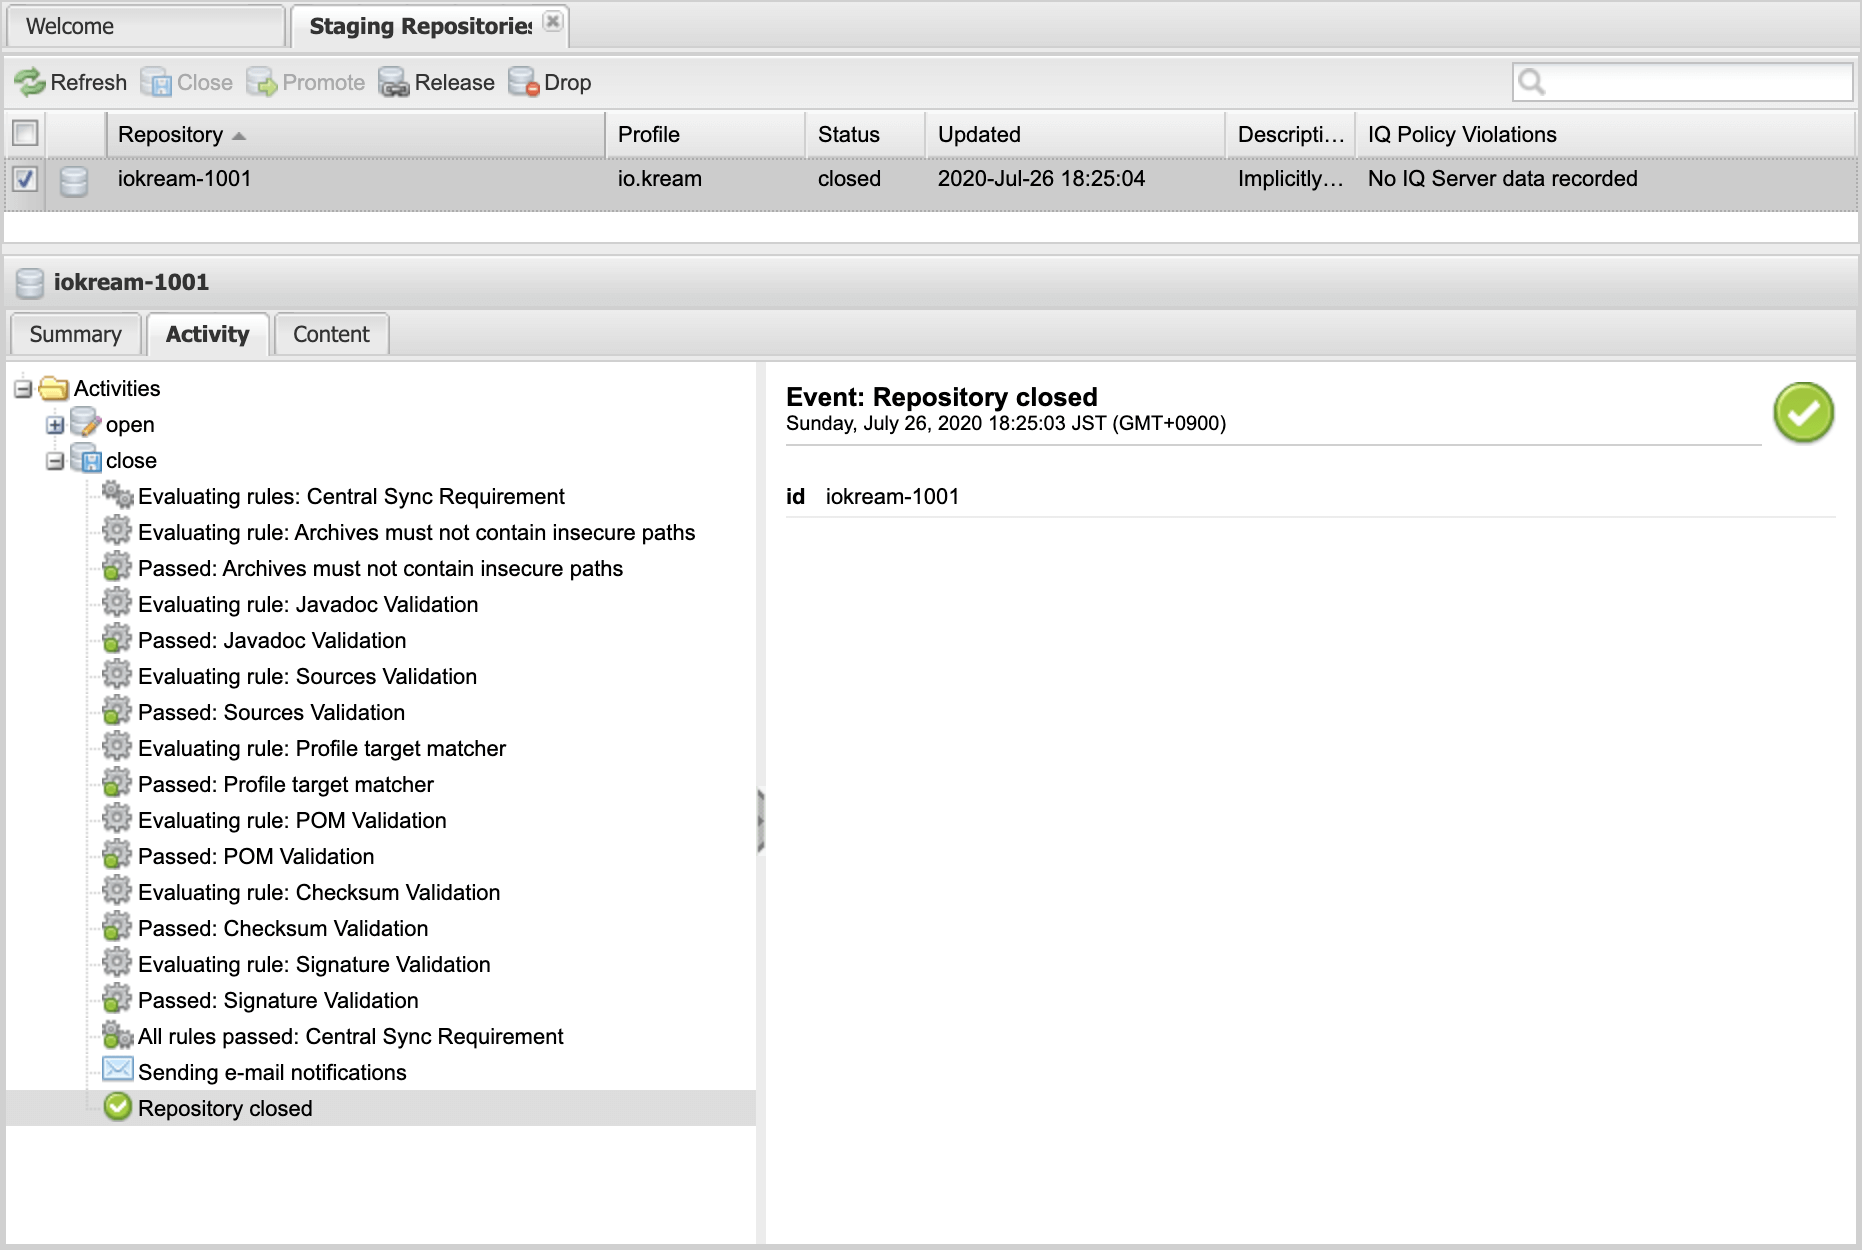
This process can take a few seconds, but hopefully, all checks pass. If everything is in order, you
can click on the Release button and the package will be copied from staging to the release
repository.
Since this is your first time publishing to Maven Central, you must comment on your Jira ticket that you’ve promoted the release, so the Sonatype employee can enable syncing. Once enabled, your project should be available for download from Maven Central fairly soon, and on search engines in about two hours.
Enjoy working on your project! 🎉